How to Manage Your Tickets
A step-by-step walkthrough for signing in, viewing your orders, and transferring tickets to a friend.
Accessing Your Account
Your Red River Station ticket account can always be found at tickets.redriverstation.com — look for the "Sign into my account" button in the top right corner.
- 1From the ticket page, select Sign into my account. If you already have an account, log in with your email and password. If not, creating one only takes a minute.
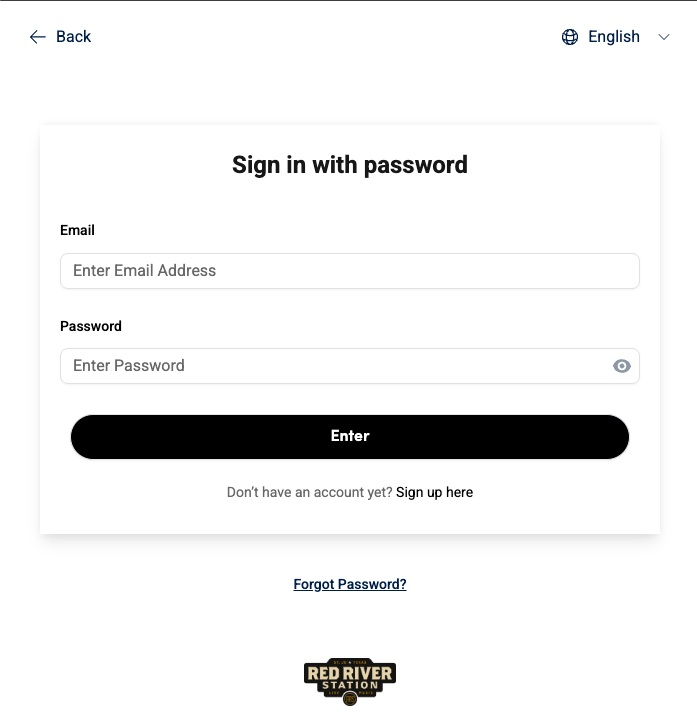
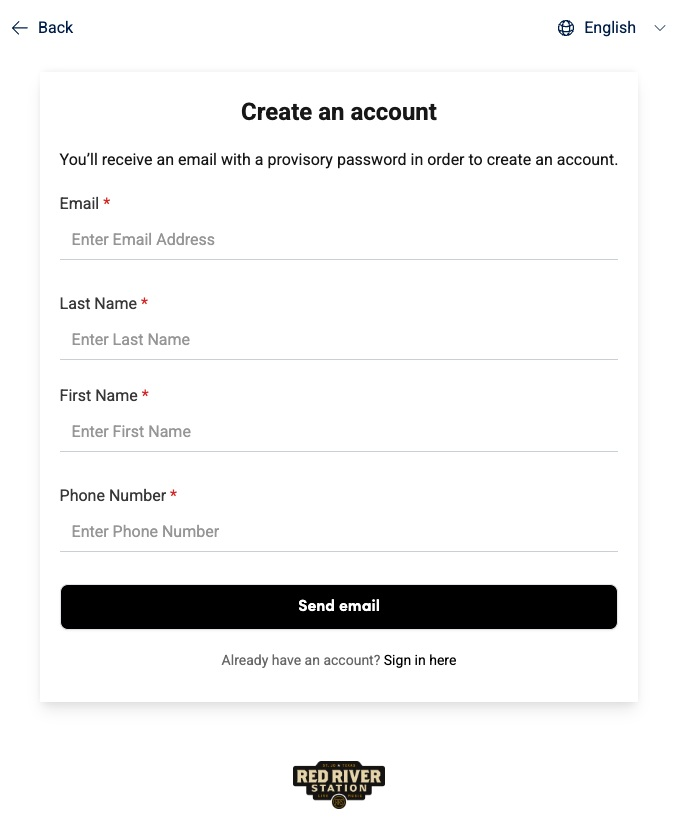
Tip: When creating your account, use the same email address you used to purchase or receive your ticket. You'll receive a verification email — once confirmed, you can sign in.
Viewing Your Orders
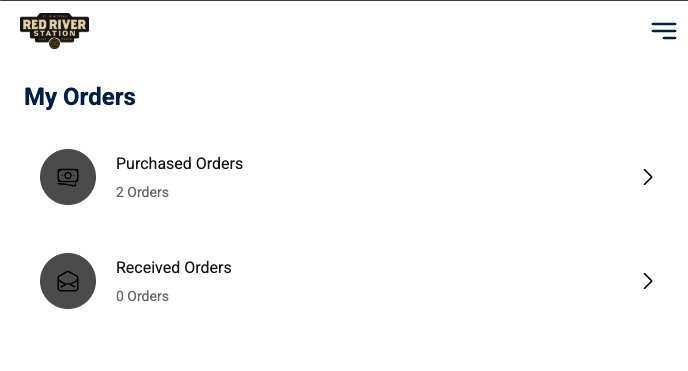
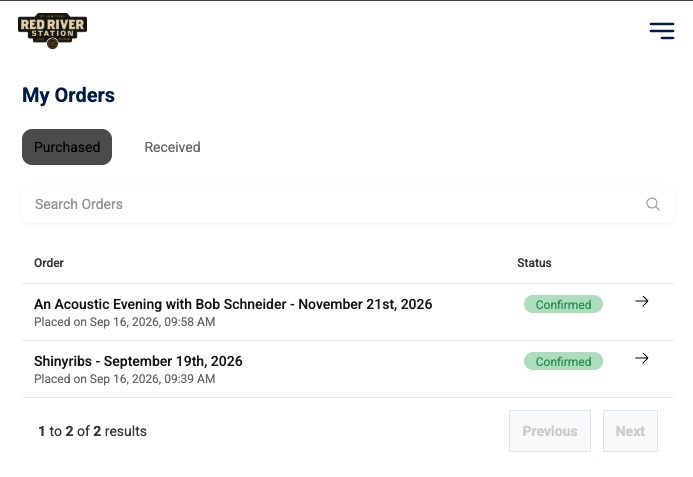
Once you're signed in, you'll land on the My Orders screen, where every ticket you've purchased or received is just a tap away.
- 1Choose Purchased Orders to see tickets you bought, or Received Orders for tickets transferred to you.
- 2Purchased Orders shows a summary of every event you hold tickets for. Tap any event to manage its tickets.
Managing Your Tickets
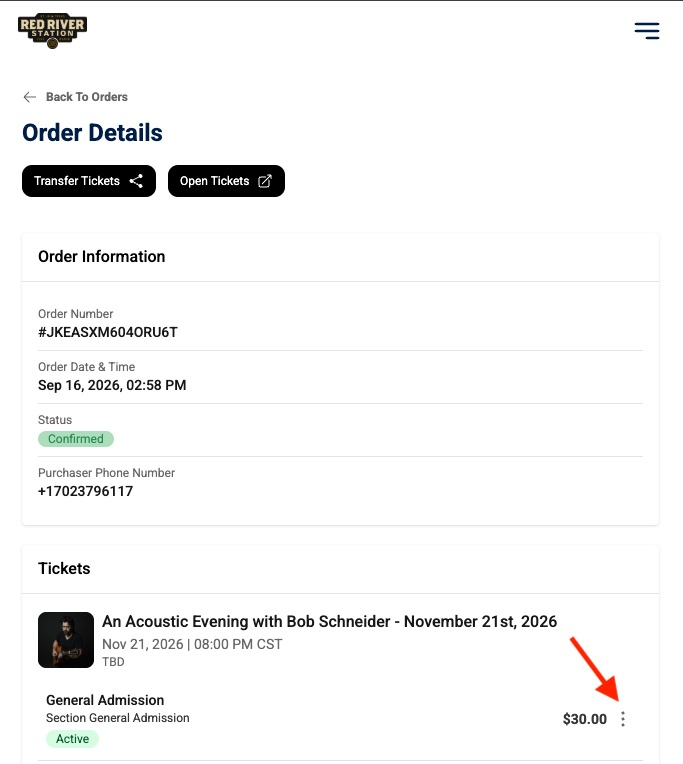
After selecting an event, you'll see its Order Details screen. There are three ways to manage your tickets:
- 1Transfer Tickets — send all or part of your tickets to a guest.
- 2Open Tickets — pull up your ticket to scan for entry or download to a mobile wallet.
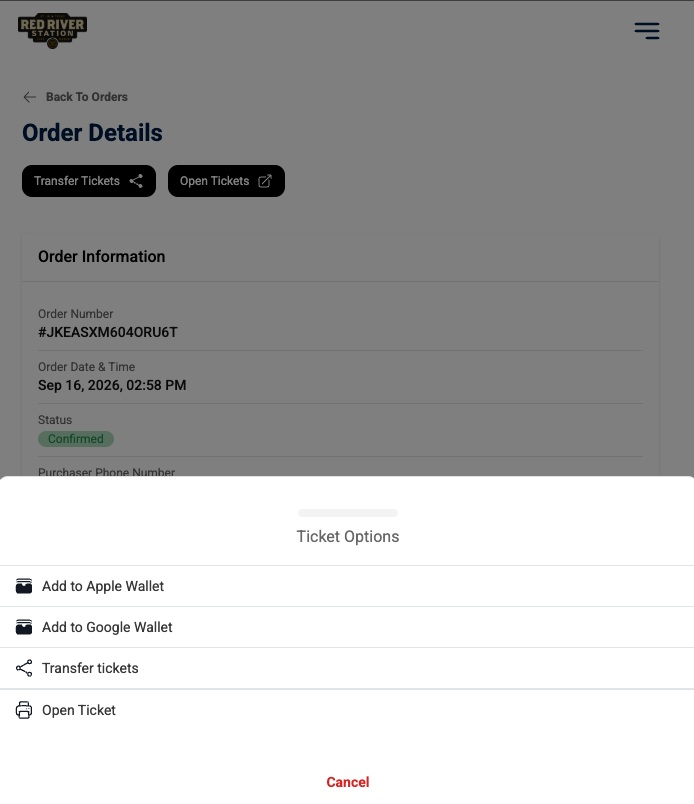
- 3The ⋮ menu next to a ticket — more options, including adding it to Apple or Google Wallet.
Transferring Tickets to a Guest
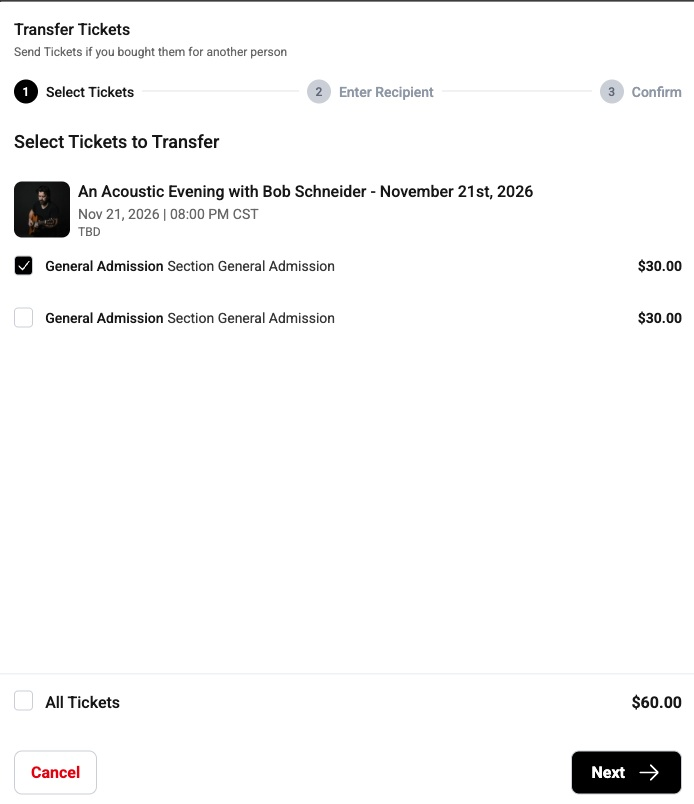
Sending tickets to a friend is a quick 3-step process: select tickets, enter recipient information, and confirm.
- 1Select Tickets — check the box next to each ticket, or choose "All Tickets". Select Next.
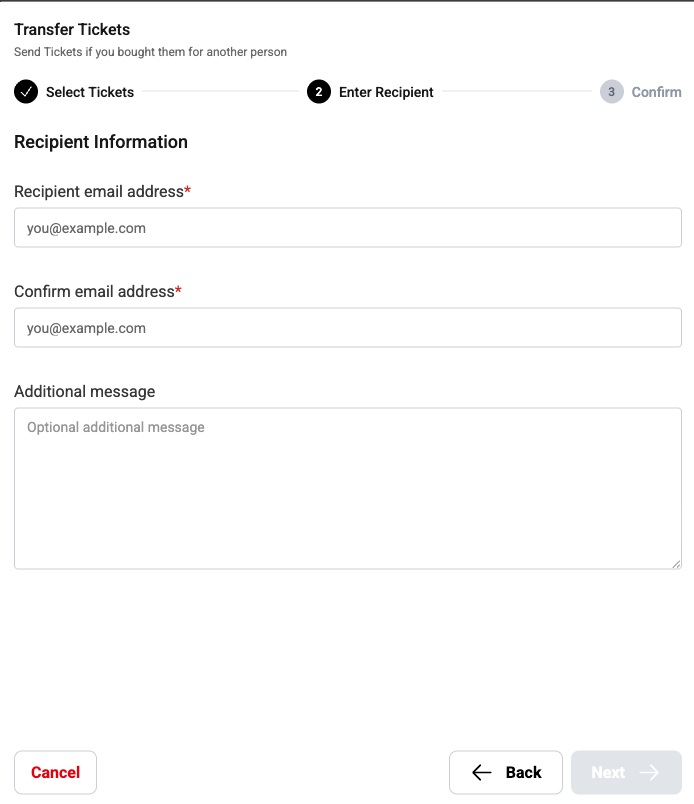
- 2Enter Recipient — enter your guest's email (and confirm it), plus an optional note. Select Next.
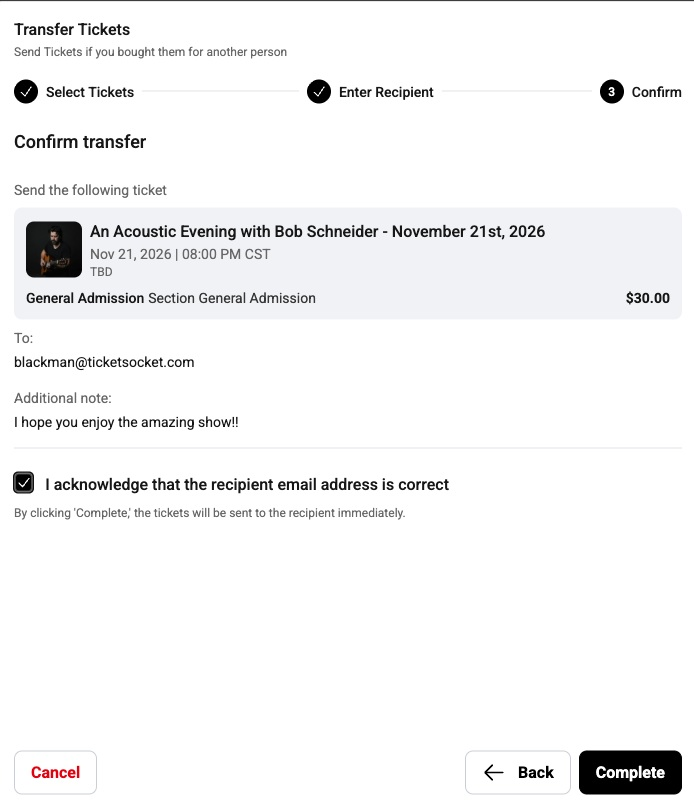
- 3Confirm — check the box to acknowledge the email is correct, then select Complete. Tickets are sent immediately, so double-check the address.
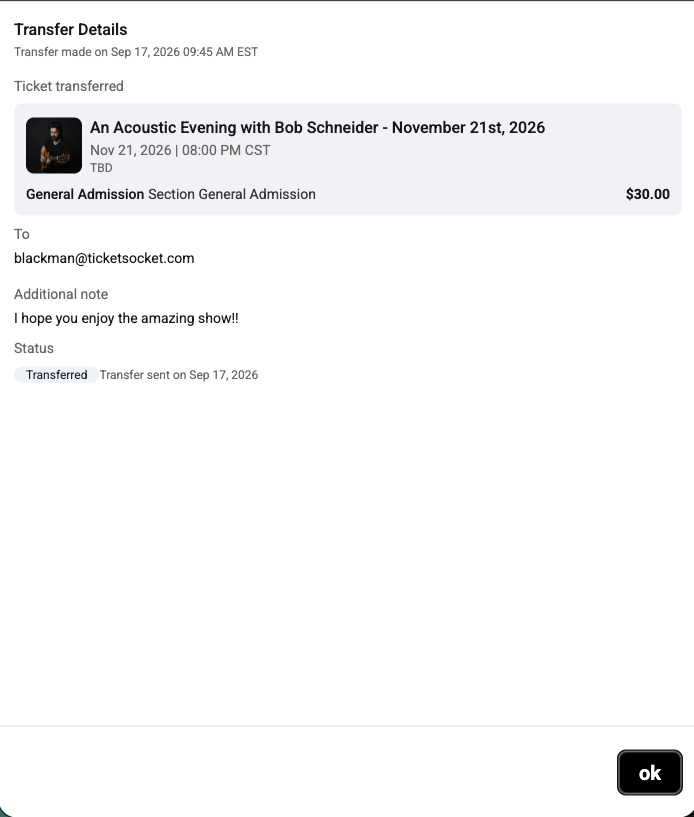
Once complete, you'll see the transfer details: the event and ticket type, the recipient's email, and any note you included.
What Your Guest Receives
Your guest gets an email with everything they need to access their tickets — no account required, though they can create one to manage things themselves.
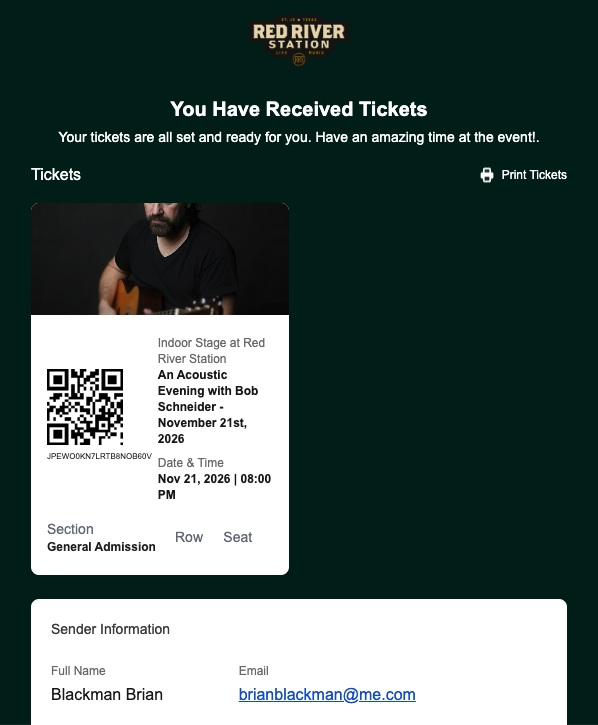
Good to know: Your guest can open the email to access their ticket directly — including the QR code needed for entry — or create their own account.